

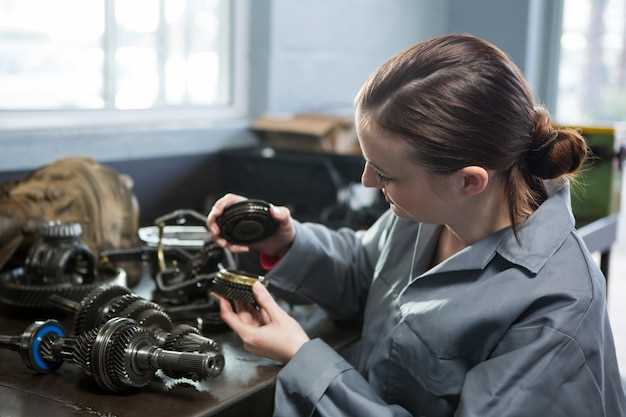
Replacing old engine components during restoration

The restoration of automotive engines is a crucial aspect of car maintenance and performance enhancement. Over time, engines can experience wear and tear, leading to decreased efficiency and reliability. One effective method to address these issues is through component replacement strategies, which allow car enthusiasts and mechanics to rejuvenate their vehicles without the need for a complete engine overhaul.
When considering engine restoration, it is vital to identify the specific parts that require attention. This may include components such as pistons, crankshafts, and cylinder heads, each playing a significant role in the overall functionality of the engine. By strategically replacing such parts, owners can restore not only the performance of their cars but also extend the lifespan of their engines, ensuring that they remain operational for years to come.
Moreover, implementing component replacement strategies can be a cost-effective solution for maintaining the integrity of a car’s engine. Instead of investing in an entirely new engine, carefully selected replacements can revitalize performance, reduce emissions, and improve fuel efficiency. Understanding the importance of each part and its contribution to the engine’s performance is essential for anyone looking to undertake a restoration project.
Identifying Key Components for Engine Restoration
Engine restoration is an intricate process that requires careful evaluation of the various parts that comprise the engine. Identifying key components is crucial to ensuring that the restoration is successful and that the car performs optimally after the work is completed. The primary focus should be on components that are prone to wear and tear, as these are often the most critical for a smooth operation.
One of the most essential parts to inspect is the cylinder head. Damage or warping in this area can lead to significant performance issues. A thorough examination will help determine if it needs to be resurfaced or replaced entirely. Additionally, the gaskets associated with the cylinder head should be evaluated, as they are pivotal for maintaining proper sealing and preventing fluid leaks.
The engine block itself is another critical component that must be assessed. Cracks or distortions in the block can compromise the entire engine’s integrity. If repairs are needed, they should be handled by professionals using precise methods to ensure that the engine maintains its structural soundness.
Additionally, components like pistons, rings, and bearings endure substantial stress during operation and are subject to wear. Replacing worn-out pistons and rings is essential for maintaining compression and engine efficiency. Bearings should also be examined for scoring or excessive wear, as they play a vital role in reducing friction and facilitating smooth motion.
Furthermore, the oil pump and water pump are key parts that ensure the engine runs smoothly by facilitating lubrication and cooling. Both should be inspected for functionality. Replacing a faulty pump can prevent overheating and significant engine damage, making it an integral part of the restoration process.
Lastly, fuel injectors and spark plugs must not be overlooked. Clogged fuel injectors can hinder performance, leading to poor fuel economy and emissions issues. Similarly, worn spark plugs can result in misfires and decreased efficiency. Regular replacement of these parts is necessary for optimal engine function.
In conclusion, identifying key components for engine restoration is vital to achieving a successful outcome. A meticulous approach to evaluating and replacing the necessary parts can transform an old, underperforming car into a reliable vehicle, extending its life and enhancing performance on the road.
Best Practices for Sourcing Quality Engine Parts
Sourcing quality engine parts for car restoration is crucial to ensuring optimal performance and longevity of the engine. Here are some best practices to consider:
1. Research and Verify Suppliers: Always start by researching potential suppliers. Check for reviews, ratings, and feedback from previous customers. Reliable suppliers often have established reputations in the industry, which can be verified through automotive forums and community recommendations.
2. Prefer OEM or Reputable Aftermarket Parts: Original Equipment Manufacturer (OEM) parts are specifically designed for your vehicle model, ensuring compatibility and performance integrity. If opting for aftermarket parts, choose those from reputable brands that guarantee quality and have a solid history within the automotive industry.
3. Inspect the Parts Before Purchase: Whenever possible, inspect engine parts in person. Look for signs of wear, damage, or inferior craftsmanship. High-quality parts should meet the necessary specifications and not show any visible defects.
4. Request Documentation: Always ask for documentation, including warranties, certifications, and specifications. A reliable supplier should provide clear information regarding the part’s provenance and quality assurance.
5. Consider Local vs. Online Sources: Evaluate the benefits of local suppliers versus online retailers. Local shops can offer immediate access and personalized service, while online sources may provide a wider selection and competitive pricing. Assess your specific needs to determine the best option.
6. Build Relationships with Trusted Vendors: Establishing a relationship with dependable vendors can lead to better deals, insider knowledge on new products, and improved customer service. Trustworthy suppliers may also provide exclusive access to quality parts and discounts for repeat customers.
7. Stay Informed about Industry Trends: Keeping abreast of the latest trends and advancements in engine technologies can help you make informed decisions about the parts you need. Regularly consult automotive trade publications, online forums, and industry expos to enhance your understanding.
By following these best practices, you increase the likelihood of obtaining high-quality engine parts, ultimately leading to a successful car restoration project.
Step-by-Step Guide to Replacing Engine Components
Restoring an engine requires precision and patience. Follow these steps to effectively replace components while ensuring the longevity of your car’s performance.
1. Identify the Problematic Parts
Before starting any restoration, conduct a thorough assessment of your engine. Listen for unusual noises and examine for leaks or performance issues. Utilize diagnostic tools to identify the specific components that need replacement.
2. Gather Necessary Tools and Parts
Compile all required tools such as wrenches, screwdrivers, and socket sets. Purchase the necessary parts from reputable suppliers to ensure quality and compatibility with your car model.
3. Prepare the Workspace
A clean and organized workspace is crucial. Ensure you have ample lighting and access to power sources. Lay out tools and parts for easy access during the restoration process.
4. Disconnect Battery and Drain Fluids
Safety is paramount. Disconnect the battery to avoid electrical shocks and drain all fluids (engine oil, coolant) to prevent spills during component removal.
5. Remove the Old Components
Carefully remove the faulty engine parts following the manufacturer’s guidelines. Take note of the order of disassembly, as this will assist in reassembly. Store removed parts in an organized manner.
6. Clean the Engine Area
Before installing new components, clean the surrounding engine area. Remove any debris, oil buildup, or residual fluid. This will ensure a proper seal and prevent future complications.
7. Install New Parts
Begin installing the new components in the reverse order of removal. Ensure each part fits correctly and secures tightly. Refer to installation manuals and torque specifications for guidance.
8. Reconnect Fluids and Battery
Once all parts are securely in place, refill the engine oils and coolant. Reconnect the battery and double-check all connections to ensure functionality.
9. Test the Engine
Start the engine and monitor for any unusual sounds or leaks. Allow the car to idle and check the performance of the replaced components. Test drive the vehicle to ensure stability and responsiveness.
10. Final Inspection
After the test drive, perform a final inspection. Ensure that all tools are accounted for, and review the work completed. Regular maintenance following the restoration will help prolong the life of your new engine components.


