

How to deal with rust in restoration projects

Rust is a common challenge encountered in various restoration projects, affecting not only the aesthetic appeal but also the structural integrity of materials. This guide aims to equip you with effective rust removal techniques that can be applied in different settings, ensuring successful outcomes in your restoration endeavors.
Understanding the nature of rust and its formation is essential for choosing the appropriate removal method. With a myriad of techniques available, from chemical solutions to abrasive tools, it is crucial to select the right approach that aligns with the specifics of your restoration project. In this article, we will explore the most effective rust removal strategies, emphasizing their benefits and potential drawbacks.
By mastering these rust removal techniques, you can extend the life of your materials and achieve impressive results in your restoration tasks. Whether you are working on vintage cars, garden tools, or structural components, this guide provides valuable insights that will facilitate your journey towards successful restoration.
Choosing the Right Rust Removal Method for Different Materials
Selecting an appropriate rust removal method is crucial for successful restoration projects, as different materials react uniquely to rust and its removal techniques. This guide will outline effective strategies for various common materials, enabling you to choose the best approach for your restoration efforts.
For ferrous metals such as steel and iron, mechanical methods like wire brushing or sanding are often effective. These techniques physically remove rust but can also scratch the underlying surface. Following mechanical removal, applying a rust-inhibiting primer or paint can provide lasting protection against future corrosion.
Aluminum surfaces require more care, as they can be easily damaged by aggressive methods. Chemical rust removers specifically designed for aluminum can dissolve rust without harming the metal. Always follow the manufacturer’s instructions and ensure proper ventilation when using chemical solutions.
When dealing with stainless steel, it’s essential to avoid harsh chemicals that can alter its protective chromium oxide layer. Instead, consider using a mild abrasive pad or specialty stainless steel rust removers. Regular maintenance, including cleaning with soapy water, can prevent rust from forming in the first place.
If you are working with automotive parts, such as bumpers or chassis, there are rust converter products available that not only remove rust but also convert it into a stable compound. This can be a time-saving option for larger areas where mechanical removal might be impractical.
In the case of wood materials affected by rust stains from metal fasteners or fittings, a combination of sandpaper and a mixture of vinegar and water can effectively lift the discoloration. Always test in an inconspicuous area first to ensure the wood does not get damaged.
Lastly, for delicate items or surfaces where precision is key, such as antique furniture or fine instruments, professional restoration services may be the best choice. These experts often employ methods that blend chemical removal with careful handwork to preserve the integrity of the original piece.
In conclusion, understanding the material at hand is vital for choosing the right rust removal method. Each approach requires consideration of the potential risks and effectiveness to ensure a successful restoration outcome.
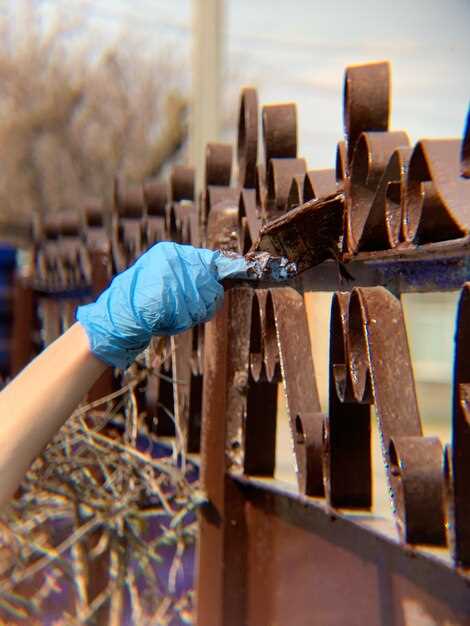
Step-by-Step Guide to Using Chemical Rust Removers Safely
Using chemical rust removers can significantly enhance your restoration projects by effectively eliminating rust. However, it is essential to follow safety guidelines to ensure a smooth and hazard-free experience. This guide outlines the necessary steps for safe usage.
Step 1: Gather Your Materials
Before starting, collect all necessary materials. You will need:
- Chemical rust remover
- Protective gloves
- Safety goggles
- Dust mask or respirator
- Wire brush or scrubbing pad
- Plastic container for application
- Drop cloth or tarp
Step 2: Prepare the Workspace
Ensure your workspace is well-ventilated. Choose an outdoor location or a garage with open doors. Lay down a drop cloth or tarp to protect the surrounding area from spills and splashes.
Step 3: Read Instructions
Carefully read the manufacturer’s instructions on the rust remover product. This information will provide specific safety precautions and application guidelines pertinent to that particular chemical.
Step 4: Wear Protective Gear
Put on your protective gloves, safety goggles, and dust mask or respirator. This gear will shield you from harmful fumes and direct contact with the chemical.
Step 5: Apply the Rust Remover
Pour a small amount of the rust remover into a plastic container. Use a brush or cloth to apply it evenly over the rusted area. Make sure to cover all affected spots thoroughly for optimal results.
Step 6: Allow Time to Work
Let the rust remover sit for the period specified in the instructions, typically ranging from a few minutes to several hours. This step is crucial for the chemical to effectively dissolve the rust.
Step 7: Scrub the Area
After the recommended time, use a wire brush or scrubbing pad to eliminate the remaining rust. Apply gentle pressure to avoid damaging the underlying surface during the restoration process.
Step 8: Rinse Thoroughly
Rinse the area with clean water to remove any residue from the rust remover. Ensure all chemical traces are washed away, as leftover chemicals can cause future corrosion.
Step 9: Dispose of Waste Properly
Dispose of any used materials, including gloves and rags, following local hazardous waste regulations. Avoid throwing them in regular trash, as they can pose safety risks.
Step 10: Clean and Inspect
Once the area is dry, inspect it for any remaining rust. If necessary, repeat the application process. After achieving satisfactory results, you can proceed with your restoration project.
Following this guide will ensure that you utilize chemical rust removers safely and effectively, contributing to a successful restoration outcome.
Preventing Rust Reoccurrence After Successful Repair
After completing a successful rust repair, it’s crucial to implement measures that will prevent rust from returning. While thorough removal of rust is the first step, long-term protection is essential for maintaining the integrity of the repaired area.
One effective guide for preventing future rust issues includes applying a high-quality rust-inhibiting primer. This primer creates a protective barrier between the metal surface and moisture, significantly reducing the risk of oxidation. Ensure that the surface is meticulously cleaned and free of contaminants before application to achieve optimal adhesion.
In addition to using a primer, the application of a durable topcoat is recommended. This extra layer not only enhances the appearance of the repair but also provides further protection against environmental factors that contribute to rust formation. Choose a paint specifically designed for metal surfaces, which will offer superior resistance to corrosion.
Furthermore, regular maintenance is key in rust prevention. Conduct periodic inspections of the repaired areas, looking for signs of wear or damage to the protective coatings. If any chips or scratches are found, promptly touch up these areas to prevent moisture from reaching the bare metal.
Another critical aspect to consider is the environment where the metal components are located. If applicable, ensure proper ventilation and avoid exposure to excessive humidity. Using dehumidifiers in enclosed spaces can help maintain lower moisture levels, further reducing the risk of rust formation.
Lastly, consider the use of rust inhibitors or protective sprays for ongoing maintenance. These products can offer an additional layer of protection against rust, creating a barrier that makes it difficult for corrosion to initiate once again.
By following these guidelines and implementing preventative strategies, you can significantly reduce the likelihood of rust reoccurrence after successful repair, ensuring the longevity of your restoration efforts.


