

How to refinish a faded boat hull

Maintaining the appearance and integrity of your boat is crucial for both aesthetics and performance on the water. One of the most significant aspects of boat maintenance is the care of the hull, which often suffers from fading due to prolonged exposure to harsh marine environments. Sunlight, saltwater, and even algae can take a toll on the beauty and functionality of your vessel.
Refinishing your boat hull not only restores its original luster but also protects it from further damage. In this guide, we will explore the necessary steps, tools, and techniques required to effectively rejuvenate your faded hull. Whether you are a seasoned sailor or a weekend enthusiast, understanding the refinement process will empower you to keep your boat looking its best.
From assessing the extent of the damage to applying the right finish, this comprehensive overview will equip you with the knowledge to tackle the project with confidence. Get ready to dive into the world of boat maintenance and learn how to bring your boat hull back to life!
Preparing Your Boat Hull for Refinishing
Before you begin the process of refinishing your boat hull, it is essential to thoroughly prepare the surface to ensure a smooth and lasting finish. Proper preparation not only enhances the appearance but also contributes to the durability of the newly applied coatings.
Start by cleaning the hull with a mild detergent and fresh water to remove any dirt, grime, and marine growth. Use a scrub brush or sponge to tackle stubborn spots, ensuring that all surfaces are free from contaminants. Rinse well and allow the hull to dry completely before proceeding.
Next, inspect the hull for any damage such as scratches, chips, or blisters. These imperfections need to be addressed prior to refinishing. Use a sandpaper of appropriate grit to smooth out rough edges and remove any loose paint. For deeper scratches or blisters, fill these areas with a suitable marine-grade filler, allowing it to cure as per the manufacturer’s instructions.
Once repairs are made, sand the entire area that will be refinished. This step is crucial for ensuring that the new finish adheres properly. A medium-grit sandpaper is ideal for this stage, followed by a finer grit to achieve a smooth surface. Pay special attention to corners and hard-to-reach areas where paint buildup may occur.
After sanding, wipe down the hull with a clean cloth or tack cloth to eliminate dust and debris. A lint-free cloth will help ensure that no particles interfere with the adhesion of the new coating.
Finally, consider applying a primer specifically designed for marine applications. This step can significantly enhance the bonding of the topcoat and prolong the life of your refinished hull. Once the primer is applied and dried according to the instructions, your boat hull will be ready for the refinishing process.
Choosing the Right Products for Hull Restoration
When embarking on the journey of refinishing your boat’s hull, selecting the right products is critical to achieving a successful and long-lasting restoration. Begin by identifying the materials used in your hull. Most boats are constructed from fiberglass, aluminum, or wood, and each requires specific types of products for optimal results.
For fiberglass hulls, look for high-quality gel coats and marine paints designed specifically for UV protection. These products not only enhance the appearance of your boat but also provide a protective barrier against environmental elements. Brands like Interlux and Awlgrip are well-regarded in the boating community for their durability and color retention.
If your boat’s hull is aluminum, you will need to select a specialized marine-grade paint that prevents oxidation and corrosion. Products that include aluminum primers are essential to ensure proper adhesion and longevity of the finish. Consider using paints from manufacturers such as SeaHawk or Pettit for their robust formulations.
For wooden hulls, consider products that offer both aesthetic and protective qualities. Marine varnishes or sealants that are resistant to water and UV rays will help maintain the wood’s natural beauty while protecting it from the elements. Epoxy-based products, like West System Epoxy, can also provide a strong foundation for further refinishing efforts.
In addition to the primary coatings, don’t overlook the importance of preparation products. A good cleaner or degreaser will ensure that the surface is free of any contaminants before application. Additionally, sanding supplies and polishing compounds should be chosen carefully, as they can significantly influence the final look of your refinished hull.
Lastly, consider purchasing supplies that include easy-to-follow instructions and recommendations for application. Products that come from reputable manufacturers often provide detailed guidelines, which can help streamline your refinishing process and yield the best results for your boat’s hull.
Step-by-Step Process for Applying a New Finish
The process of refinishing your boat’s hull involves several crucial steps to ensure a durable and attractive finish. Following this guide will help you achieve a professional result, enhancing both the appearance and longevity of your vessel.
1. Preparation: Start by thoroughly cleaning the hull. Remove dirt, grime, and old finishes using a suitable marine cleaner and a scrub brush. Pay special attention to any stains or discolored areas. Once clean, rinse with fresh water and allow the hull to dry completely.
2. Inspection: Examine the hull for any signs of damage, such as cracks or blisters. Repair these imperfections using compounds recommended for marine use. Sand the repaired areas smoothly, ensuring a level surface for the new finish.
3. Sanding: To promote adhesion for the new finish, lightly sand the entire surface of the hull. Use sandpaper with a grit appropriate for your boat’s material; for fiberglass, a 220-grit sandpaper is often ideal. Avoid deep scratches that can affect the final appearance.
4. Cleaning Again: After sanding, clean the hull again to remove dust and debris. A vacuum can help remove particles effectively. Wipe down the surface with a clean, damp cloth to ensure no residue remains.
5. Priming: If the boat’s hull requires it, apply a marine primer to improve the adhesion and durability of the final finish. Choose a primer compatible with the type of finish you will be applying. Allow the primer to cure according to the manufacturer’s instructions.
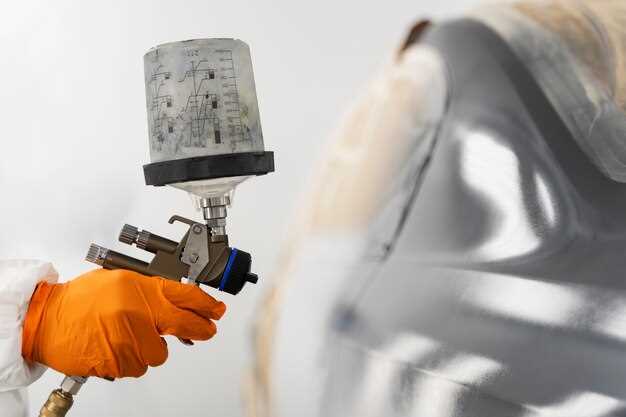
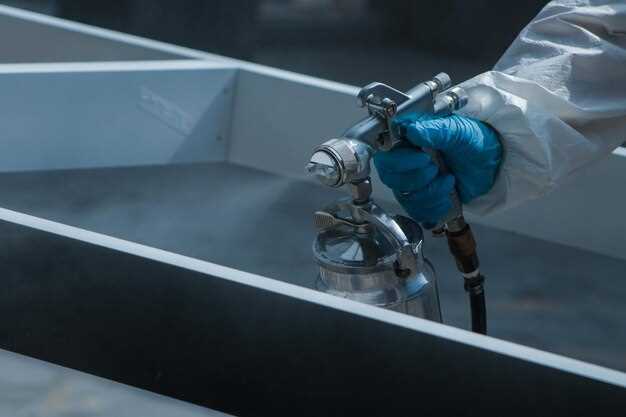
6. Applying the Finish: Now it is time to apply the actual finish. Use a brush, roller, or spray method, depending on the type of finish and your comfort level. Apply a thin, even coat, and follow with additional coats as recommended by the finish manufacturer, allowing adequate drying time between coats.
7. Final Inspection: Once the final coat is dry, inspect the hull for any imperfections. If necessary, sand with a fine-grit sandpaper and apply an additional coat to those areas. This step ensures a uniform look across the entire hull.
8. Curing: Allow the finish to cure completely before putting the boat back in the water. This is crucial for the durability and effectiveness of the refinishing work.
By following these steps meticulously, you can successfully refinish your boat’s hull, restoring its former glory while providing optimal protection against the elements.


