
Painting your own car – tools and techniques

Painting your own auto body can be a rewarding and fulfilling project for DIY enthusiasts. With the right tools and techniques, you can achieve professional-like results without the need for costly shop services. By understanding the fundamentals of car painting, you can give your vehicle a fresh look or restore its original beauty, all while enhancing your skills.
The process begins with selecting the appropriate paint type and ensuring your workspace is well-prepared. Proper ventilation, adequate lighting, and a clean environment are essential to achieving a flawless finish. Whether you choose single-stage or base-clear coat systems, knowing the differences can greatly impact your final outcome.
Moreover, mastering various application methods, such as spray painting and using touch-up pens, is crucial for a smooth and even finish. Utilizing the right tools, like a high-quality spray gun or air compressor, can streamline the painting process and minimize imperfections. By honing these skills, you’ll not only enhance the aesthetic appeal of your auto but also gain confidence in handling projects that improve your vehicle’s value.
Choosing the Right Paint Sprayer for an Even Finish
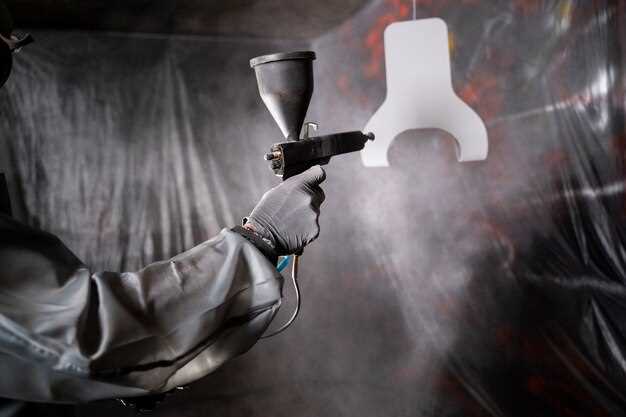
When embarking on a DIY auto body painting project, selecting the right paint sprayer is crucial for achieving an even and professional-looking finish. Various types of sprayers are available, and understanding their features can help you make an informed choice.
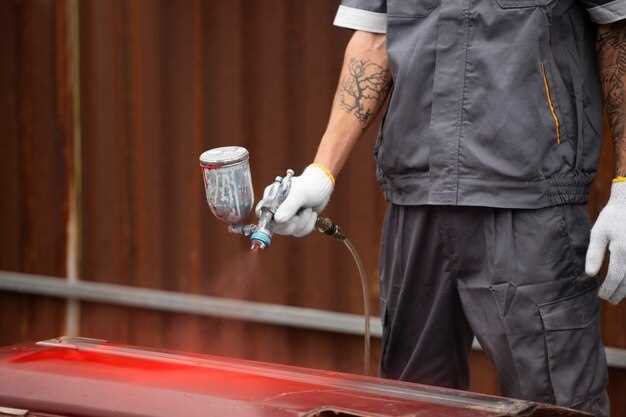
Airless paint sprayers are ideal for large surfaces and can deliver a smooth, even coat without the need for compressed air. These sprayers push paint through high pressure, which helps in achieving a thick and consistent layer. They are often preferred for auto body work as they can handle a variety of paints, including those meant for automotive finishes.
HVLP (High Volume Low Pressure) sprayers offer another excellent option. They provide better control over paint flow, and the lower pressure minimizes overspray, making them great for detailed work. HVLP sprayers are particularly suitable for smaller areas or touch-ups, allowing you to achieve an even finish without wasting product.
Consider the tip size of the sprayer; it plays a significant role in how the paint is atomized and ultimately affects the finish. A smaller tip size is best for detailed work, while a larger tip can be used for larger areas. Always check the manufacturer’s recommendations for the specific paint you intend to use.
Additionally, the paint viscosity should be considered. Some paint sprayers require thinning the paint to achieve the correct consistency for spraying. Always follow guidelines to avoid clogging the sprayer and ensure a uniform finish.
Ultimately, choosing the right paint sprayer can significantly affect the final outcome of your auto body project. By evaluating your needs, understanding the features of different sprayers, and following proper techniques, you can achieve a beautiful, even finish.
Preparing Your Vehicle Surface for Optimal Paint Adherence
Preparing the surface of your vehicle is crucial for achieving a professional-looking paint job. The first step in this DIY process is ensuring that the body of your auto is clean and free from any contaminants. Use a high-quality automotive soap and water to wash the entire surface thoroughly, removing dirt, grease, and old wax that could interfere with paint adherence.
After washing, it’s essential to dry the surface completely to prevent water spots. A microfiber cloth works well for this purpose. Once the vehicle is dry, inspect the surface for any imperfections such as dents, scratches, or rust. These flaws can affect the final finish, so they must be addressed appropriately. For minor scratches, use sandpaper to smooth the edges, while deeper imperfections may require body filler to create a uniform surface.
Next, sanding the entire area to be painted is a critical step. Utilize a fine-grit sandpaper (around 320-grit) to scuff the existing paint. This will promote better adhesion of the new paint layers. Be sure to sand in a consistent manner, avoiding any uneven spots that could affect the appearance of the finished job. After sanding, clean the surface again with a solvent like isopropyl alcohol or a dedicated wax remover to eliminate any sanding dust or debris.
If you are working on an area previously painted with a different type of paint, it may be wise to apply a primer. A proper automotive primer can help improve adhesion and can also provide an even base for your new paint. Make sure to follow the manufacturer’s recommendations for drying times before moving on to the painting process.
Finally, before applying any paint, ensure the workspace is well-ventilated, and take the necessary precautions for safety. With the surface of your auto properly prepared, you are now ready to proceed with painting, confident that your work will yield optimal results.
Techniques for Blending and Finishing Touches in Auto Body Painting
Achieving a professional finish in auto body painting requires meticulous attention to blending and applying finishing touches. One effective technique for blending is the use of a spray gun with reduced pressure. This allows for better control and smoother transitions between the new paint and the existing surface. When working on touch-ups, always start from the edges and work your way in, gradually overlapping with the original paint to create a seamless effect.
Another essential method involves the use of a blending solvent. This can help to soften the boundaries of the newly painted area, facilitating a smoother transition. Apply the solvent lightly with a clean cloth, ensuring that you don’t disturb the newly applied paint. This technique is particularly useful for fixing small imperfections or when blending different shades of paint.
Utilizing a clear coat is also crucial for finishing touches. After your base color has dried, applying a clear coat not only enhances the shine but also provides protection against environmental elements. Make sure to apply the clear coat in thin, even layers to prevent runs or sags. Allow adequate drying time between coats for optimal results.
Finally, polishing the painted surface with a fine-grade compound can elevate the overall finish. Once the clear coat has cured, use a dual-action polisher or a soft cloth to buff the surface gently. This will help to eliminate any minor imperfections, giving your DIY project the professional appearance it deserves.


